
CyberLink PowerDirector Review
It's wonderful that PowerDirector's latest issue has tried to keep all users on the same...
Detailed Reviews
Have you ever watched a video online? Well, certainly yes! Have you ever tried to edit a video? Once, twice, or never! But still, you sure must be familiar with video editing.
Usually, we shoot videos on camera and then edit them with software. These editing can also be done in real-time, like using a virtual reality object in-camera filters. It is similar to Snapchat or TikTok filters.
For editing a video outside of these filters, i.e., over a raw video file, we need special tools called Video Editing Software. This software is bequeathed with sophisticated armories that allow an experienced user to do a movie studio-style editing.
To check the full potential of these tools, we need to learn using them first. Practice and experience are crucial to understanding complex tools like video editors.
Pros
- Best in class for detailed and UI friendly video editing.
- The preset themes and effects are classy. It has proper customization and keying for most preset themes.
- The video overlay and PiP objects offer fascinating green screen type effects.
- Adding chapters and subtitles is best. Subtitle editor has many detailed special effects
- The final exporting of videos has one of the top-class tools. One can easily convert an edited file into multiple formats for 2D, 3D, or DVD format.
- Being part of CyberLink, it has one of the best customer support options and a detailed online theme store and tutorial.
Cons
- Audio Editing is less than average and requires additional software products.
- Some of the advanced keying features need to be enhanced in it.
- No skin feature for the converter UI, which can hinder many users.
- The setup UI is too detailed for novice users. A sample project with tutorials on core editing effects can solve that.
Introduction
Out of many such video editor tools, we will assess one of the top products named CyberLink PowerDirector. From the lap of one of the most active organizations in the software industry, this video editor came into existence in 2001.
Since then, it has gone through several quality updates and now stands amidst the top 5 video editor products. The tool comprises of various editing utilities like video effects, audio effects, chroma-key effects, 3D effects, and many more.
The initial releases were very flat and did not offer anything extraordinary. However, they added many unique features like particle effect, True Velocity rendering, motion cameras, and 4k editing in later updates.
The current version PowerDirector 18 is packed with such advanced tools. The best part is that they offer a free of charge trial edition. You just need to register an account on their website.
Once done, you can enjoy all the features of CyberLink PowerDirector for 30-days. We’ll explore it and try to condense the assessment. It will be a hunt for critical video editing features, UI, and lag-free performance.
Owing to CyberLink’s reputation, we are hoping that we have one apex product on our hands.
Initial Run-through and Exploring the Main Panel of the Video Editor
The main dashboard of PowerDirector is pretty much stamped with elementary setup. It is divided into several zones, like every other video editor.

The top two zones are the Preview Panel and File Explorer Panel. In the lower parts, we can see the Timeline Mode and Storyboard Mode. Both of them are used to make changes to the files accordingly.
There is a Navigation Panel on the top left side, with choices for the media room, text room, particle room, overlay mode, audio mixing, channels, etc. Now, let us see the file explorer given here.
There are about 10 samples given by PowerDirector with images and videos for us to test on. Some of these are pre-edited.
The media player on the side consists of some standard play options with the addition of 360° view mode.

On top of the media manager, we can see choices for adding plugins, selecting the project location, capture screen or video, and a disc creator.
Going through the UI setup itself, we are experiencing healthier vibes.
UI Perks in the Main Panel
To begin with, PowerDirector allows us to import media files from a drive location. After that, we need to select a file for editing. If these files are in 4k quality, it will recommend the shadow mode for fluent editing. Its quality is lower in the shadow mode, but it remains the same in its final output format.
As you add them, we can view a video preview pane. It will detect the 3D effects automatically in a video. The bottom timeline is used to manage these videos and the effects to be added in them. This timeline has row-wise sections that can be used to separate content like video effects, audio effects, etc.

Depending on the section, right-clicking will show you the relative editing options. The timeline can be zoomed In/Out. We can add markers to the timeline too. These markers serve as flag-points, where we want to add or edit something.
The video can be trimmed at the beginning itself. Precut is a tool that enables us to do the trimming work. We can select the part to save and part to cut. You can’t pick multiple areas to be trimmed. You can cut only one section at a time.
Once chosen, pick Insert Selected Track. After that, it will separate the audio and video of a file in separate rows. One interesting part is that we can even name these markers.
This is one of the first video creators that added marker naming. Naming markers placed in a video for editing usually make filtering easy.

There is also a drag mode given by them to manage the opacity and volume keyframe. We can even divide the frame directly using a slider button. Now, what if you don’t want any changes in a video or audio track?
Well, each row comes with a lock button. Enable it, and no changes shall be made to that track after that. It can be unlocked again too.
Now that we are familiar with the basics of this video editor, we can finally move to see the detailed editing it offers.
Choosing from Amazing presets in Effect Room
Just below the Media Room, we can access the Effects Room. This is the place where we can input multiple effects in our video from many preset templates.
The effects are divided into multiple sections depending on their type, like 3D particle effects, special/style effects, text marketing, and visual effects.

Each of them can be seen in the preview mode itself. Once the video is loaded, you can simply click an effect and then add it to the timeline segment.
With this, your effect is now applied to a video. It may cause some glitching if you have low PC requirements. But, can we add simultaneous effects in a single video segment?
Well, the answer is certainly yes. We can add multiple effects in a single clip.
There is an effect row in the timeline mode. In this row, we can directly drag a slider and adjust the effect’s length. For each effect, we can alter its intensity and other parameters.
We can even alter these settings at each keyframe of a video. This is truly stupendous! The best part is that all of these can be learned instantly and without much hassle.

We can even split an effect into two. Once you are done with adding these effects, you can choose to lock this toolbar.
Overall, these effects are simple to execute. Honestly, there isn’t anything much to be added to it. As far as preset samples go, its stockpile is more than enough. If you still want more, you can visit their online store and buy more packages.
With this, we conclude the Effect Room features. Comparatively, it has performed on par with Adobe Premiere, Lightbox, Pinnacle studio, etc. The detailing in this section steals the show.
Using Video Overlay (PiP objects)
So, this might be a new term for many readers. Well, worry not, we are going to ease things for you here. PiP is an acronym for Picture-In-Picture.
Video Overlay means the same. In video overlaying, we can superimpose a video or animation over another video.

With this, we can present multiple animations in a single video. It is quite fascinating, isn’t it? For that, head to the video Overlay-Room, just below the Effects-Room.
In the Video Overlay, we can find limited templates for many PiP objects. This is to lower the software size, possibly. There are some 35 effects in the base package.
To get more objects, use their store feature. If you are worried about the appearance of these objects, you can even edit them inside PowerDirector.
Pick an object and just right-click to edit it. We can modify the PiP attributes as well as the mask properties. In the PiP attributes, we can edit the graphics, shadows, rotations, opacity, etc.
The Mask Settings allow defining the shape of implementation and are highly changeable. With time, you will be able to make your own custom objects.

Like the effects section above, one can even set the key attributes, aliases, and even keyframe settings in it. Huff! So much to learn for a single type of editing.
It may seem bit drowning, but this is what a pro video editor must offer, and every person must learn such effects to master it. Once you are done overlaying, patch the selected area and lock its effect.
Now, as far as the feature reveals, CyberLink PowerDirector’s work is top-class. There isn’t anything to pitchfork here. The implementation of UI and the details in it are staggering.
Particle-Room Effects
Another highly utilized effect in the bag of PowerDirector is this particle style effect. In simple terms, it uses smaller animated objects in the video effects.
In the above section, we can make a Chewbacca chase Han Solo. But here, the changes like flying stars, falling leaves, snowfall, rain, etc. can be added.
Their application is akin to the above processes. Just pick a preset theme, go to the timeline location, and click add. This will add the effect to that position.

For detailed editing, there isn’t much to improve except the style. The modification for the timestamp is the same as the previous sections. For altering the effect, you need to pick Modify Particle.
With this, we can modify the particles effortlessly. There are several settings given in this portion, like particle intensity, rotation, opacity, motion path, etc.
For more variety, head to their online shop. The good thing is that these preset templates are mostly free and are customizable. This supports the video creators who merely want a part of that template.
This concludes the possible customization in the particle room section, which performed decently.
Managing Text Effects in the PowerDirector
Want to see happy birthday pop on your sister’s birthday video, or maybe add subtitles in a movie? For these aspects, we need to switch to the text editor.
CyberLink PowerDirector has one of the easiest methods for adding texts. To do that, we need to select the type of text we need to add to a video.
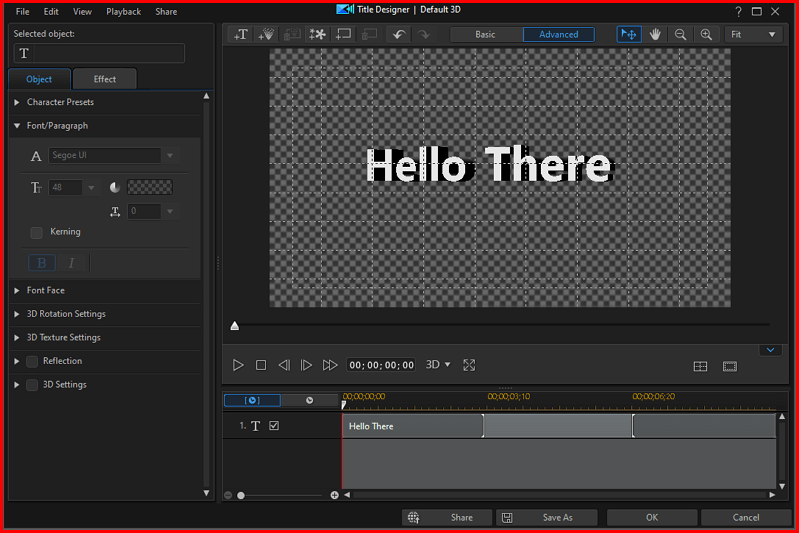
The text can be added by hitting the text field. The text customization is ordinary, i.e., standard font formatting, as seen in font editors.
Now, add the text, its formatting, and then move to another location for adding text. We can effectively utilize the markers to add texts.
The Text Section in the timeline can be altered to shorten or lengthen its display duration. For further settings, double click the text filed in the timeline.
It will open another menu to add more features. You can do fundamental as well as advanced editings like 3D settings, colors, alignment, and other amazing 3D effects.
It is advised to play with these text effects. Unless you try multiple combos, you won’t learn to give perfect spooky text flashes in your videos.

Overall, it can add some serious graphical texts in any video. You will feel like a Hollywood CGI director once you get the hang of it.
Now, talk of comparison, PowerDirector fairs pretty high in this section. It rivals even Corel’s VideoStudio, Adobe Premiere, and Pinnacle Studio Ultimate.
When it comes to types of preset animation given by PowerDirector, the default stocks are less. You need to download more from their online store. Many cool text effects are free of cost there.
All in all, PowerDirector has adequately supported text editing in videos, aiding with stupendous text effects.
Add Transition Effects to Videos and Photos
Have you ever seen a presentation without any transition effect? And things can get too boring if there aren’t any attractive effects in a presentation to spice it up.
For that, slide transition effects are quite popular. Related to that, PowerDirector has given serious transition effects that can be reasonably utilized in both videos and photos.
To add transition effects, move to the endpoints of a clip. Select a transition from the list provided and merely drag it into the timeline panel.
This will add that transition effect to the video. After that, you just need to edit the transition settings. It supports both cross and overlap transition.

Many special transition effects are customized easily. If that’s not enough, the audio transition is also present. Or else, you can simply collect some transition effects from their online store for free.
For us, 3D transition effects were the best, and the alpha transitions were unique too. The personalization in both of them was quite detailed.
Effect perimeter, sharpness, keyframes, and shift progression was modifiable. It was truly a thorough experience.
Compare this to other video editors, as mentioned before, we found PowerDirector to be quite interesting. Their online store compensates for lower stock inside the transition frames.
We would even say that these effects can even be used to make a presentation. The UI may be a bit difficult for some users to grasp. Honestly, without fooling around, it can be very tough to understand its capabilities.
Audio Mix-Up and Voice Recording Room
Flawless audio features are as much essential as an optimized video. Both are to be in sync, or else it can be quite drastic. Imagine all the anime shows you’ve watched to be devoid of thrilling background soundtracks. Dreadful and annoying, isn’t it?
For the audio mix up, we will be using the Audio Room in PowerDirector. The audio room consists of multiple methods to enhance the audio tracks.
The primary tracks to edit are voice-overs, music track, and audio tracks. Individual audio, as well as the default audio, are editable here. To see the full picture, select a track first.

The only setting you can access from the audio room panel is managing decibel values and normalization. To do more editing stuff on the audio files, go down and access the audio track from the timeline pane.
Right-click and access the advanced audio options. The advanced options include typical items like audio trimming, audio ducking, audio enhancements, and adding audio effects.
For detailed editing, the CyberLink PowerDirector Ultimate Suite has Audio Director too. The Audio Director is a separate product altogether for audio editing and hence skipped here.
You can download and learn it yourself. The inbuilt editing features are great, and it’s more sophisticated. The audio editor is a good workaround for novice and mid-range players.
Overall, this is all you’ve got in audio editing. The core theme is to choose perfect audio for a video. After that, combining effects and scrubbing the audio isn’t much of a deal.

Lastly, we can even do a live recording and add voice-overs in a video. Click the mouse icon and head to the audio recording room. From there, pick the device to record voice.
Once done, you can edit the recorded voices. Like before, the time cannot be edited randomly. You need to record it before and then edit it. The live recording only supports normalization and noise controls, audio fading, and time span.
This concludes the audio and recording feature of PowerDirector. As seen from the overhead review, it is ordinary. We didn’t find something great in the audio mixer or editor. For that reason, you have to switch to some better tools to change audio files.
Adding Chapters and Subtitles
Have you ever read a book without sections, phrases, and chapters? No, it would be an answer to the most. Similarly, it can be quite interesting to see a video divided into chapters.
This can ease the work for further editing and providing a timestamp for the viewers. To add these chapters, a straightforward method is to use the timeline pane.
Go to Chapter Pane from the top left navigation bar. After that, navigate to the time of the video where you need to add chapters. Use the C-Button to add chapters at the selected time.

This is the swiftest way to add chapters. Other ways include properly adding chapters, like at the start of a fixed frame, at fixed time intervals, etc.
The chapters at fixed intervals require the interval limit, in minutes, which hampers some customization. We cannot add this interval in seconds.
It’s quite shabby of them honestly. The next option allows dividing chapters into limited sections. The program will decide the time interval of each chapter based on the number of divisions inputted. You can jump to a video section and select that as the chapter thumbnail.

The last added feature is the Subtitle Room. From here, we need to import a subtitle file first. After that, we can edit the fonts, subtitles, and other texts too.
Users can input some amazing effects in subtitles, which is fascinating to have. With this, we conclude the core features that are accessible from the top left panel.
These are all the editing features we frequently encounter in every video editing tool. The last part lingering on is exporting videos.
Publishing the Final Edited Video
After all the cut scenes, video editing, and sound effects, we need to publish a final copy of our film. For starters, the video we are using may be too raw and big for regular devices.
At 4K UHD quality, even a 30 seconds video can exceed 400 MB size. Now, there are other factors too, like video format, audio format, and compatibility to be seen before conversion.
Managing them all can be nasty. However, PowerDirector has added some better approach here. From the top tabs, pick the Produce Tab.

The final edited copy will be saved automatically. Once this tab opens, we can see publishing formats like 2D, 3D, device-specific, and online platforms.
These formats are frequent in all types of video publishing platforms, be it on DVD, online format, or local storage. Also, each of these contains different settings to make a better video output.
In the first form, we can directly use the Profile Analyzer and assign a format to the video automatically. Here, the typical formats are AVI, MPEG-2, H264(AVC), H265(HEVC), image sequence, and plain audio.
We can add some usual personalization here. The HEVC format isn’t usable in the trial version, which is an accessible format in online streaming and movie piracy.
This is because it supports much better compression and maintains better picture quality than other formats. Choose the rendering method, some sound effects, and color options.

Once done, you can begin the conversion process. The final output file can also be previewed simultaneously, but that would be too much for the low-end machine. Better switch off the preview.
The next choice is for 3D conversion. We can even use this feature as a 3D converter for simple 2D files. The formats for 3D conversion are Windows media format, MPEG-2, and H264(AVC).
We can change the theme of these 3D files and encoding stats too. The device selector aids us directly in converting a file into a preset format for a variety of devices like DV tape, Android devices, Apple devices, Sony devices, and other formats too.
The online site for uploading includes YouTube, Dailymotion, Vimeo, etc. Overall, there won’t be much hassle while rendering and final conversion of the edited videos.
You just need basic knowledge about video codecs and formats used across several devices.

Lastly, we can create a DVD too using PowerDirector. We can add chapters in the DVD menu, change the text and color too. This time also, PowerDirector has made sure that nothing is short of a perfect DVD.
With this, our journey exploring various features of CyberLink PowerDirector ends. Let’s wrap it up in conclusion below.
Conclusion
The core idea behind any video editing is to not only adding flashy effects but also to manage a stable and practical video conversion. CyberLink PowerDirector provides both of these.
The lesser preset templates make sure that the software package isn’t too big and is editable. The online store for these templates is impressive. Their integration requires minimal effort.
Overall, compared to top products like Corel VideoStudio, Adobe Premiere, Pinnacle Studio, etc., PowerDirector holds on its own quite well. It has the elements of both, a mid-level as well as pro-level video editing.
The pricing is also viable, given the smooth UI and features we get. All in all, CyberLink PowerDirector is one of the top video editing software that you can truly rely on.