
Format Review
Detailed Reviews
Pros
- Unrestricted Trial: Format features can be accessed via the two-week trial version without using credit card or any payment information.
- Good Templates Stock: Compared to its competition products, Format has better stocks and more visually appealing templates.
- Hassle-free UI: It has one of the most sophisticated UI for site building.
- Greater Customization: It is armed with more features for page customization to get a detailed editing experience.
- Dedicated Blogging: Unlike other portfolio sites, Format has its own blogging platform along with feeds from social media.
- High-quality Audio/Video support: Users can input high quality of photos and videos on their portfolio sites.
Cons
- High Cost for Regular Users: The cost of packages is more than the features endowed, especially for the general
- Mediocre Customer Support: Even though their chat support is quick to reply, they need more options for connecting to the users.
- Half-Baked Features: Some of the features like client proofing, store, etc. are half-baked, i.e., needs more features and improvements in them.
- No Media/Storage Manager: Contrary to most portfolio sites, there is no media/file manager in Format.
- No Widget Menu: Format has no dedicated widget tab to add items to the page.
- No Backup for Deleted Photos: Format does not have a recycle bin or a backup plan for deleted items, a crucial feature of portfolio site.
- Inadequate Storage Plans: Amount of Photo Storage is minuscule for a portfolio site, even for premium users.
- No Sale Analytics: Lacks a separate dashboard displaying the sale analytics.
- Lack-Luster Store Functions: The store has minimal features and is highly self-fulfilled type.
- No Image Editor: Apart from an external integration with Adobe Lightroom, there is no basic image editor inside the builder.
Overview
In these modern times, gone are days when memories are only stored in our brains. Using the invention of photography, we have now achieved the art of keeping the memories alive.
As we all see on TV, News, Internet, and more such visual platforms, all of them are filled with vivid images, videos, etc. Among them, sites like Instagram, Flickr, 500px, etc. have become popular to save all those photos as well as display them to the world.
What if we want to print and frame those memories? What if an aspirant photographer wants to get the best value of his work? All these activities can be easily done by making a website of our own. This website will be like a real-life art gallery and will not only display your work but also publish and send it to the customers.
Such a website requires a website builder. However, traditional website builders will come with tons of extra perks, out of which most of them will be redundant for mere photo gallery usage.
Aiding to the needs of our fellow photographers in publishing their content, Ideaform had launched its portfolio website service called Format.com.
Founded in 2010, at Toronto, Canada, this portfolio site builder has been steadily gaining its momentum in photography and portfolio making.
This site is armed with the latest content and features for making an amazing portfolio website. Even though the staff is small for this company, they have given us an excellent product to appease your inner photographer.
Not only mere upload and download of photos, but this builder also has the facility to publish them in a variety of sizes and frames, along with worldwide delivery locations.
As we are going through details of the features Format provides, we will be evaluating it and then let you decide if this product is challenging the top shots of portfolio site builders.
Let’s have a quick walkthrough
Many of our novice readers may get confused at the beginning regarding the functions of a portfolio site builder. Is it similar to the traditional site builder? Can I make a portfolio site directly using a website builder? Why should I invest in a different website builder than the traditional one?
All these questions may be storming our young and old minds alike, who want a dedicated photo sharing platform. Worry not! As we said earlier, Format is separate from traditional site builder in the sense that it is used primarily as a photo sharing platform and allows printing and distribution of it.

To start using the Format portfolio site builder, you can begin by registration on their site. Once you are into the account after login, Format will prompt to input several details about your website like its name, URL you want, and then ask you to start uploading the photos on their servers.
 Once you have uploaded the photos to their servers, you will need to pick up a suitable theme for your website. You can choose from any theme given by Format under templates section and start working on your site.
From here, you will be engaged to the main panel of your account. This panel will list out some of the incomplete tasks like adding images, contacts, set up themes, etc. You can quickly go through these steps one by one or choose to discontinue the initial walkthrough.
As you can see on the main panel, the three main content for portfolio site making will be shown. These are adding photos, creating pages, adjusting the design and lastly manage the E-store.
The printing/publishing and distributing the photos is part of the E-store. There is also a proofing and blog section for us. You can head on to the general settings to tweak domains, plans, security, etc. related stuff.
The main menu bar is visible on the left-hand side. This navigation bar will list all the areas that you can modify in this builder. If you want, you can choose to book a demo for a quick audio-visual guide.
Let us now move on to see what kind of templates Format has to offer and will they be able to deliver some unique pages.
What kind of Templates they have?
Most of who have built websites before or even as a novice know the importance of aesthetic looks for any website. Without any good looks and proper user-friendly navigation across the pages, a site will not attract any viewership and eventually fade away in rankings.
As we have emphasized earlier, we will not see any flashy templates like the traditional site builders since this is strictly portfolio site builder. Most themes here will reflect the flashy looks of cover magazines or photo albums in your house.
In the beginning, with new user walkthrough, you will be pointed to input a theme for your site. You can also change the theme of your site later on.

To see the entire stock of themes, head on to the home page of Format and select the Themes Button from the top navigation bar. On the theme page, you will see the list of all available themes, grouped on their respective sections.
One thing we noticed in Format different from other portfolio sites was that it had much better theme design and a bit more stock compared to SmugMug and PhotoShelter. Also, the themes preview was way more interactive than its counterparts with a beautiful animated view of both desktop and mobile site, when you hover on these themes.
As you see on the themes tab, there are various categories from which you can pick different themes for your site. The premium themes section is their latest addition to it. The premium themes are made more interactive and have lots of animation across the page to give an out of the box experience.

The selected themes now need some photos for their gallery which can be added via the upload button on the top. All these themes are responsive types, and so they will adjust accordingly on mobile devices. Unlike mainstream website builders, you cannot edit the content of the mobile site separately.
Some users may be skeptic about this since they have very less customization. Since one rarely adds too many external scripts and elements to portfolio sites, so you can be assured that the responsive function will take care of your mobile site.
However, most themes were more related to traditional photography stuff and were deficient in other categories like sports, food store, holidays, trekking, etc. We can only hope Format adds more such unique and broader theme base in their stock in later updates.
How did the Site Editor perform?
Until now, most of us have gotten the rough impression of how the Format and its functionalities work. Now its time to dig for more details and find out the detailed aspects of what modification and customization we can do with the themes above, to make an amazing personalized site.
To begin the editing process of the site, go to the Pages Tab on the main menu bar on the left. Select the page that you want to start on and click the Edit Page Content on the top of the page.

This will open the editor of that page. The primary tabs that you can see here are Gallery, Alt Text, Settings, and Edit Design. Remember that every page has a few different editing options. Currently, the above editing tabs are present in the main gallery page.
In the gallery page, you can add or remove current images. There is an Add Item+ button on top of page sections. This will let you input Images, Videos, Texts, Header text, and image.
As usual, the images, videos, and texts are easy to add. Just upload the relevant files, and it will be displayed on your gallery. The header field can either have text or only image, so choose the best one for the header.
The second tab here is the Alt Text. This tab is used as minor SEO for your images. You will see the vertical list of all your items in the gallery. There are two fields that you can fill here, viz. Captions and Alt text for each file.
Input the Caption and Alt Text accordingly and make sure to keep the Alt text unique for each file. This will separate the SEO for those files and avoid any duplicity errors in search rankings. You can use the clear all button to empty all filled texts in one go.
Next tab is regarding the general setting of that page. Here, you can add the title for your gallery, decide the visibility of your page for your audience, input a URL for it, SEO items like Page Title, Keywords, and descriptions. Users can also add a separate picture for their gallery and each page. There is also a Delete Page option in case you want to flush it all.

Now let us make a new page and see what other editing options are provided in it. Click on pages menu and select the Add Page. The new pop up will ask to input the type of page you want to add. Most of these preset templates for the pages are About Us page, Contact page, Resume page, Story page, and Title page.
You can start the page from scratch too if you want. For a blank page, you can add items like text fields, images like single photos, gallery, images with texts, link sets, media like videos, audio links from SoundCloud and Spotify, Instagram feeds and custom embed codes.
On the navigation menu on the left, got to the Pages Tab. From here, the users can change the ordering of the pages and see the hidden pages too. You can unhide those pages from your site and display them on the main website.

In the pages section, the owners can also delete or duplicate a page, rename it or jump to the editing section of that page. The Create Page on the top will let the users add New Gallery, Blogs, Proofing, Product and Submenu pages.
The Forms section can input several types of contact and feedback forms. Lastly, the divider section will add separators for your page. It is important to add such separators for the new page since you can quickly move the page contents past them with ease and proper alignment.
Unlike the website builders, there is no separate widgets section here. However, SmugMug has included lots of useful widgets, and they have included them in a separate section. Some of the valuable widget items like social media links, button links, a news feed, etc. are missing.
One thing you will find is that you cannot change the font type, color and image field size in this editor. You can only change a site-wide theme to change the colors and fonts. Sites like SmugMug have the option to change the size of elements which Format should include in future updates.
To change the fonts and colors setup across the site, the editor has separate tab Design Editor. Let us see below what perks does it offer?
Website Design Editor
This feature is common in most site builders. Design Editor is usually used to change a site-wide theme for the texts, title, and logos, etc.
The core objects that you see in this menu are Theme, Website title and Logo, Colors, Typography, Social Sharing, and Code Editor. Let us now discuss them below and see what things it offers for site customization.
Themes
As the term proposes, users can change the site-wide theme using this feature. To change the theme of your site, you can choose from the presets or change the certain elements yourself.

Some of the themes are repeated from the templates section while some have just basic alterations like color schemes and fonts on those preset templates. There are 27 unique themes for users.
There is also an advanced button on the themes tab. Using this function, users can modify more items across the page themes. It will modify the header, footer, and page sections.
The first tab in the advanced option can change the alignment, separator, and height of the site menu. The subsequent tab will change the footer text. The Gallery page Settings will change the style of display of gallery on your main page. It can alter the pictures per columns, thumbnail sizes, transition speed, and style.
The owners can also change the collection page items like the cover image, cover page link, and even edit store alignment and thumbnail sizes.
All in all, it is easier to pick a preset theme and then apply some general changes to it. Some more changes like a custom color and font pairs, navigation menu types, recent pages tab, etc. can be added to the themes section.
Colors and Typography
Being the most important and sought out editing criteria for website design, colors and fonts matter a lot when it comes to the viewer experience. Many times, site builders do not allow the custom modification of both these items since novice users can disrupt the natural color combination and that may reduce the aesthetic impact on viewers.
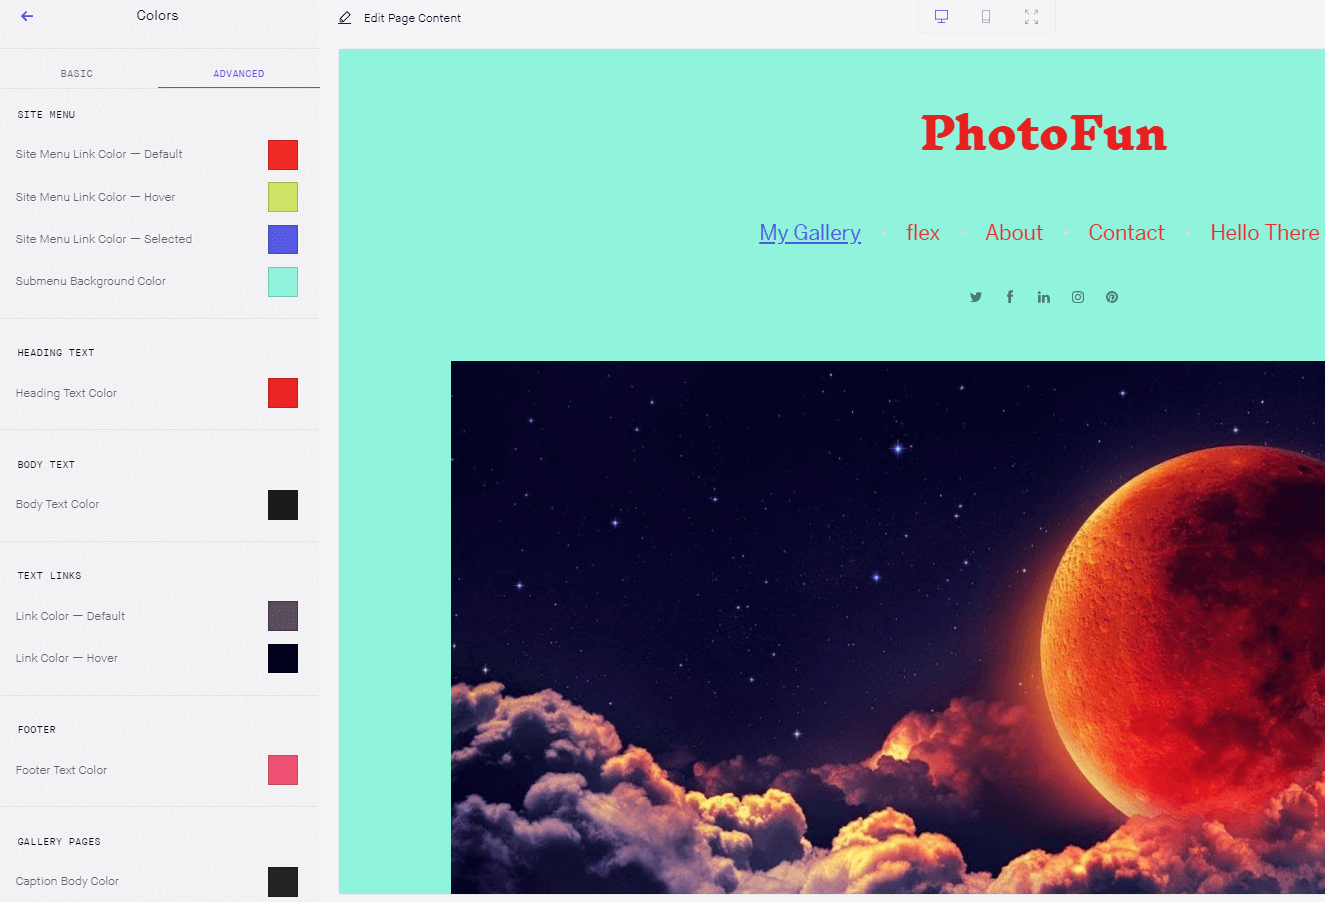
The colors tab in the design editor too has basic and advanced modification. The basic tab can change the background color, text color, and accent color. To override the basic color changes, use the advanced tab to pinpoint and edit the color schemes of items you want to.
The advanced adjustment for colors include the site menu changes, heading texts, body texts, text links, and footer text. The users can also try new colors for gallery pages. There is so much customization provided in this section viz. changing the caption body, thumbnail color and opacity, arrow colors, navigation bar colors, social icon colors and many more.
Apart from the above, there is also customization for collection pages, blogs page, store, and social links. This is the level of modification on par with a typical site builder, and most users will find this very useful.
Now, similar to the above color alteration, font editing is also fantastic. All the items mentioned above have their respective font modification functionality. The only additional change was that you could adjust the size of the fonts in pixel.

The font library has 100s of new and traditional font styles. You can choose from any custom style and also manage the space between the line via Line Spacing.
One suggestion we would add to Format as we have said earlier is to provide color and font pairings. As reasons mentioned earlier, it can be super useful if the art team of Format comes up with such a color set and font sets that can one-click change all the color/font details from the most basic to advanced details.
Website Title, Logo and Social Sharing
The first thing the new viewers will stumble upon is the site title and logo. Getting a clever design for both is a necessity.

The format has given two choices to add the Title and Logo of your site. One is that you can choose the upload button and add the official logo and title of your company and other is input the text and choose the color and font type of your title/logo.

You can add several social links via the design tab. Go to the Social Sharing Tab on the design editor and add the official page links for Facebook, Instagram, Twitter, LinkedIn, and Pinterest. This feature cannot be added separately as social media widget on other pages.
Lastly, there is a Code Editor page, that can be used to edit the website code manually. Using this feature, you can input some more widgets or color themes for your pages. However, novice users should not alter it because some irreversible errors may happen and modify your site, so if not confident in it, use for learning purpose only

Compared to other portfolio sites, the design editor was supplied with good functionalities and was easy to use. Certain things can be added to this section like font and color pairs, importing the color schemes from other themes, etc.
Selling/Printing Photos
Since we have gone through the details of every photo editing and management functions, it is now time to start making some money by using the store function.
The Store Function can be accessed via the menu bar on the left. The new sale window will display the options like Products list, Orders, Discounts and General store settings.

The first tab here is of product list. You can add some products to your store directly here. To edit any product, click on that list and you will be prompted to product settings.
You can input the product availability, its cover image, product image, and its name and description. The other things that you can add are the cost of the items and its shipping details. Add product option like the Size, Colors, Style, Quantity, and so you have done the basic steps before selling the product.
The Store Settings have an interface similar to the website builder. It only contains changing the shipping details, SEO basics, delivery, and other related notifications. You can connect the PayPal account on this page and change the visibility of the store.

The next tab is Orders. In this window, you can see the list of all the orders. It will display the order status, the buyers’ name, email ID, and order ID. The owners cannot modify the order but can cancel it with a refund.
The owners can utilize the Discount option to add any discount for its customers. There is no option to limit the purchase amount of coupons or setting a time limit. Also, few regular discount items like first five purchases, long term buyer discount, etc. be added as preset which can be edited and added directly to the store.
Now coming to the disappointment part, Format is still way behind top products like PhotoShelter and SmugMug in printing support. The entire store payment setup was tied only to PayPal. There was no COD, wire transfer, or any other payment methods.
In the field of photography and its distribution to consumers, it is important to have numerous photo frame and size options. This was not seen in Format. We can understand it being a relatively new company, but this is one of the crucial parts if you are into the photography field. Customers may want large canvases or small table frames, or any sized photo, which needs to be fulfilled.
Also, unlike SmugMug and other equivalent products, there was no list of printing vendors across the globe. The entire process was a self-fulfilled setup. Most notable vendors like EZPrints, Bay photos, Loxley Color, etc. were missing from the store.
Since the journey of Format is relatively new in portfolio site market, we would highly suggest focusing on the selling and print/publishing photos, having worldwide print support, having packages list and many more functionalities for this section.
Miscellaneous Features
Some of the features given are not so worthy of having a separate section, and so we will be discussing those misc. features here.
Client Proofing
Something similar to other portfolio sites, Format is equipped with a client proofing section. As we know, a photographer can get many numbers of clicks and may need prior consulting with the customers to print them.

For this reason, client proofing is armed by most of the portfolio site builders. The Format has Client Proofing section that can be accessed on the left-side menu bar.
This section is somewhat different from other portfolio sites since it creates a separate proofing page, instead of directly selecting images and inputting reviews. On this page, click the Add Project Button on top.
In this new project page, the users can only add Header text/Image and the shared images on the page. To provide access to other members of your teams or getting it passed by the customers.
You can add all the images to be elucidated with the client and then use the share button. Input the correct email in the invitation request and input the link of the project to them. Unlike other sites, you will not see a review option, nor there is direct access to the given client.
Other portfolio sites have the facility to directly access the shared content with clients and a rating/comment system to get feedback directly from them. The Format is still lacking the true meaning of client proofing here and so needs to engage in more site owner-client interactions like above.
Blogging
As we know that many portfolio sites, especially owned by single individuals, tend to have a distinct blog section apart from the traditional social media feeds. To aid such customers, Blog feature can be accessed in Format.
The Blog feature is available via the pages section. Select the Blog option from creating new pages tab. Choose a name for the blog and then starts adding elements to your blog.

Currently, there are minimal additional elements for the blog. Click on the Add Post to add feeds to the blog. In this, you can add either images or text to the blog pages. You can also add videos and tags to it. The blog settings will allow you to input the SEO for your blog and publish/unpublish it.
Overall, the blog features are decent, and many comparable products have not provided a discrete blog and only have social media feed support. More features like the news feed on the side, advertisings section, etc. can be added to the blog.
Other minor features included in Format are security related like HTTPS support, custom domain, Copyright settings, and integrating Google Webmaster and Google Analytics.

There is an SEO section in the Format settings menu. In this, the users can input the old-style SEO details like site title, Homepage title, Description, and site keywords. The users can also add sitemap and explore it to create smooth navigation for customers.
There is a Content SEO Tab on the same page. Using this option, the users can modify the SEO title and description across all the pages, including the hidden ones.
Adobe Lightroom is one of the interesting integration Format has, a part of Photoshop product and essential editing tool for images. It is mostly used by photographers and has quite a reputation in this field.

To integrate this tool, the users need to download the Adobe Lightroom plugin and then import that into the Lightroom application. The application will import the images from your gallery, and the users can directly edit the images and auto-update them over the servers.
Other than this, there are no other unique features in Format. Being still a new player in this market, we hope that Format works more on adding a unique feature for photo enthusiasts like us.
Our Experience
Beginning with the basic site navigation and initial guide, Format will give you a good first impression. The feature related to website editing is on par or in some cases better than the current top portfolio products like SmugMug, PhotoShelter, etc.
The image uploading was lag free, but we did feel the process was a bit slower. One thing lacking here was the image/media manager. They must add a separate file management system for images and any files uploaded on their site.
It is not possible to manage the images directly from the upload menu. This media manager can include a detailed structure and hierarchy like a typical Windows file management system. Directly doing some basic editing from here like rating the images, adding the IPTC details, watermarking, applying color schemes like B/W, sepia, etc. can be added without any trouble.
Both the normal site editing functions and design editing function receive a thumbs up from our side. Many competitors have not given such in depth editing for both. Only gem lacking here is color and font pair preset by the graphics team, for a reason stated earlier in colors section.
As we moved on, one more disappointment we crashed on was the Store features. Most of the store's stuff is self-fulfilled, and so the professionals will feel the lack of publishing services. Adding printers across the globe or using common vendors can solve the issue.
Then comes the customer support and help section. Surprisingly, the Contact Us page is not there on their main website. The only thing you will find there is a chat option in the bottom right. You can ask for Email support from chat, but proper customer services methods are not present.
Format needs more ways to interact with customers like a dedicated ticket submission, Email support, forums, and maybe telephone and remote help. The help section articles were average and needed a more stepwise detailed guide on many topics, along with visuals.
Separating the tutorials, FAQs and including forums can help improve the help section of Format. Although most of the customers across multiple review sites were satisfied with customer care, still they need to make the above suggestions for better services.
Another thing to be added is the multiple frame sizes for the buyers. These frame sizes can either be selected at customer checkout time, or the owners can preset it for the photos.
Other things that can be added in the Store are product packages, more delivery and payment options, creating a more versatile and interactive client proofing system. We hope that Format works out on the above suggestion and improve the features to encompass an improved user experience.
Final Verdict
Aside from the looks and hassle-free UI of the site, it still has a long way to go in terms of automation in publishing and selling photos, like its competition products. Not to forget they only have live-chat currently and an E-mail provision for customer support, another area to be worked on.
If you are comfortable with having a self-fulfilled portfolio site builder, you can try Format for two weeks and then conclude its worth for your wallet. And for professional photographers who are looking for broad features in their site along with main stream printing services, we would recommend waiting for some useful updates in Format and try other top products like SmugMug, PhotoShelter, etc.